LAST EDITED ON Sep-02-10 AT 09:13AM (MST)[p]I wrote this up a few years ago.
Taking Trophy Photos of Your Deer, Elk or Game Birds
You have spent months preparing for the hunt. Spend just a few extra minutes to take some quality trophy shots to preserve the moment.
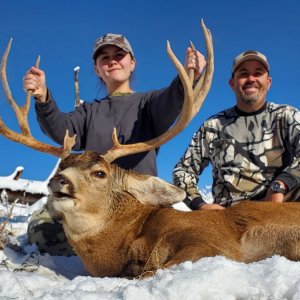
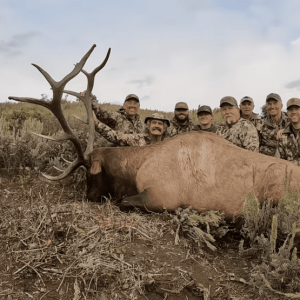
You want to feature the animal and you, the hunter, in a pleasing manner. Mostly, you will want to showcase your trophy, so get him prepared.
Prepping the animal:
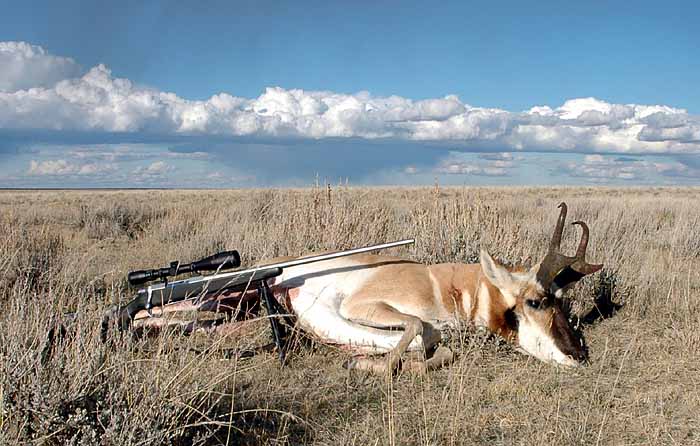
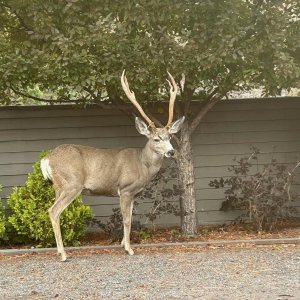
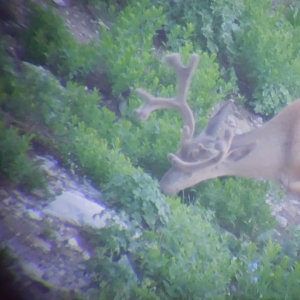
Move the deer to where you want to take the photo. Atop a small rise will allow him to be sky-lined in a photo taken with a slight upward angle. Consider any background you may want (or not want) in the photo.
Wipe off any blood around the mouth, nose and body. Use water, TP, or carry some Wet Wipes for this purpose. You may need to put some toweling way up the nose so it doesn't show to stop any blood drainage. Wiping the bloody areas with dirt and brushing the dirt off may help. Cover any major visible wound with foliage or rocks, or turn the animal so the exit wound is on the off-side.
Tuck the tongue back in the mouth, or use your knife and cut it off.
Fold and tuck the legs under the body and keep the animal upright, not laying on its side with the belly showing with legs splayed out.
Cover any blood on the ground that will be in the photo with dirt, rocks, grass.
Body Positioning:
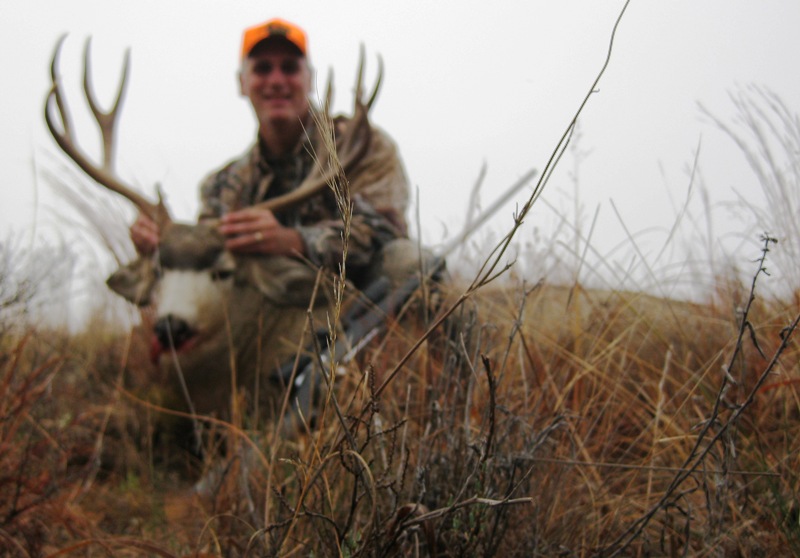
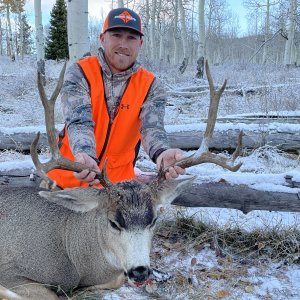
Having the antlers show against the sky or clouds will highlight them. Antlers will also show up well against a grassy hill. Don't choose a tree for a background whose branches will camouflage the antlers. Your camo shirt will also hide the antlers, so you may wish to sit to the side of the head. You will most likely want the deer's body sideways to the camera.
You can sit behind the deer so only your upper torso is visible, or sit next to the buck's head. Sit with your legs folded and tucked also, rather than sprawled. Don't have your leg stuck out and the boot sole right in the camera lens.
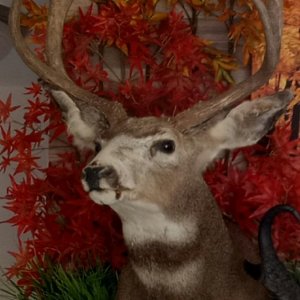
To highlight the antlers and put focus on the deer, have your head below the antler tops or the same height as the deer head.
You can have equal billing with the deer if you have your head even with the antlers.
You can enhance the size of the antlers and head by sitting further back behind the body, and using a closely placed camera with a wide angle and high f-stop setting (ala Chuck Adams).
Having the head pointed directly at the camera will accentuate the rack's width, but may hide some points. A slight quartering turn will show the points better. Have the head level or tilted down slightly. Having the head tilted back will hide the rack and make one look up the nasal passages.
Hold the deer's head up with one gentle hand. If possible, hold behind the neck or offside jaw base to hide your hand, or under base of the chin. Try not to have a mangle hold with bith hands on the antler beams.
Remember the rule of thirds. Don't center the deer exactly in the center of the photo.
Smile! Look at the camera or admire the deer. You should be happy and pleased.
Camera Positioning:
The camera should be near eye level with the deer. Have the photographer kneel or lie low, or use a tripod.
Taking photos from above the deer and hunter, with the photographer standing, diminishes the stature of you and the deer. Too much of an upward angle by taking the picture from well below is undesirable also.
Be sure the camera is level.
Lighting:
Morning or evening lighting provides great lighting for warmth, color and detail. Midday sunlight gives poorer colors, harsher shadows and will wash out detail. Use a fill flash even during midday. A polarizing filter will help eliminate glare that hides color and detail, and make the sky appear a darker blue.
A fill flash will help illuminate the shadows in the deer's and your faces. Tilt your cap back a little to help eliminate shadows. The flash will make the deer's eyes glow bluish green. A set of glass eyes from a taxidermist or a piece of electrical tape will stop this possessed look. A fill flash in the middle of the day will also highlight you and the deer by illuminating you. Take some photos both with and without a flash. Some cameras will allow you to vary flash strength, so an overly bright flash does not overexpose and blow out the closer objects. Use a partial flash setting, rather than a full flash setting if you can, so detail and color are not washed out. The flash is to just fill in the shadows.
Be sure the sun is not casting any shadows from the antlers across your face, or your shadow upon the deer's head. Be aware of the shadow cast by the photographer or tripod. Have the sun angling from the front, and not from behind if possible. If from behind, be sure to take some with a fill-flash.
Tip your cap back to remove the shadows from your eyes.
Camera Settings:
Using the aperture priority mode, set the aperture to a low f-stop, like 2.8 Or use the portrait setting which usually chooses a wide aperture. This will give a shallower depth of field. The background and foreground will be out of focus, and this will draw the viewer to the sharply focused deer and you.
Choosing a high f-stop like f-16 or f/22 will give a greater depth of field and allow both the deer and background to remain in focus. Many lenses are sharpest around f/5.6-f/8. Vary f/stop to get the desired results.
Focus the camera on the deer's eyes, as you would on a person's eyes for a portrait shot. Zoom in so you and the deer fill the frame. You can crop excess fore and background and then enlarge on the computer, but photo quality may be sacrificed if the image is excessively cropped.
Set the digital camera's picture quality to its highest setting.
Use a polarizing filter to reduce glare and enhance colors.
Use a tripod to get a steady camera.
Use a remote shutter to allow you to have the proper position. A self timer may not give you but a few seconds to scurry into place.
Utilize the white balance setting to match the sun, shade, clouds or snow, or be sure it is set on auto.
You may wish to spot meter on the deer for proper exposure. Having the deer in the shade with a bright sunlit background, snow or sky will leave the deer underexposed and appear like a dark silhouette. You may wish to bracket your exposures.
Check the histogram for proper exposure.
http://www.luminous-landscape.com/tutorials/understanding-series/understanding-histograms.shtml
Other Tips:
Remove blaze orange as it will mess with exposures and the bright color will attract the photo viewer's attention away from the deer.
Pull or bend over any grass that sticks up in the way between the camera and your and the deer's heads. Bend down next to the camera and look for obstructions.
Take your photos before field dressing.
If you forgot your camera in your pack, or had no time right before nightfall, set the deer up outside of camp the next morning and take some good photos. A head and cape on a rock or log can still make a good photo.
To highlight your rifle, hold it in your hands, across your arm, or lay it against the deer's body. Don't have the muzzle pointing at you, even if it is unloaded (and it should be at this point). Don't lay the rifle across the antlers like in a gun rack.
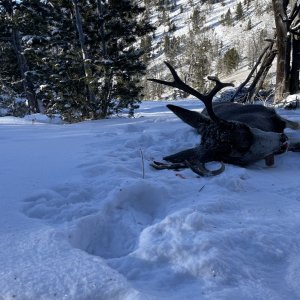
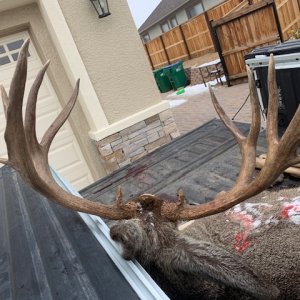
Please, no tailgates with a bed full of beer cans for a background, tree hangings, garage floors, hanging tongues, or blood. Don't sit on the animal.
Look behind you and check for unwanted clutter like packs, water bottles, game bags.
Look at websites or various quality hunting magazines like Eastmans, Muley Crazy, Trophy Hunter. Look at the good and the bad of photos, and get some ideas.
Take lots of photos to hopefully take one good keeper.
Good Luck Hunting!
You are welcome to visit my Photo Gallery here
http://dougkoepsel.smugmug.com/

 Sometime I will have to tell you where they are at!