mozey
Long Time Member
- Messages
- 3,204
Posted about these previously in the NM forum and in this forum under this thread:
http://www.monstermuleys.info/dcforum/DCForumID18/3620.html
Thank you all for your tips, I used a lot of them.
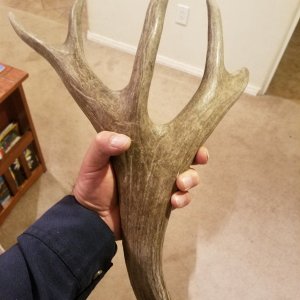
Thought I'd show a time sequence from when I found them last spring to how they look now. Here's a cell phone pic of how they first looked when I picked them up (not ATL):

Porcupine did quite a bit of damage to the left g2 and g4, and time and weather also extracted their toll: lots of deep cracks and holes. But it was obvious that they came from a special deer, so I was excited about attempting to restore them. Got a lot of good tips from the NM and Shed Hunting forums, as well as from BIGBULL48.
I initially repaired the points and cracks using epoxy putty. The filling and sanding and refilling and re-sanding proved a tedious chore for my A.D.D., and I started to lose interest until got a Mountain Mike's Skull Kit and attached 'em just to see what they would look like:

That got me excited to start again. I liked how my repair job on the left g4 looked, but never did like the left g2, so I cut it off and started over. It eventually looked like this:

Time to stain. I initially tried to use W.A.M., but I failed to read the directions where it said it wouldn't stain putty and natural bone evenly. The result was where the natural bone was left exposed looked great, but the repaired parts obviously did not blend in. My fault, I should have read the directions better.


Even my wife and daughters, who nothing about these things other than to mock me, could tell it wasn't working, and now had something new to mock me about. Back to the drawing board. I asked BIGBULL48, who in his spare time is wildlife artist and taxidermist, would he recommend I should do. He told me get some enamel based off-white spray point and cover up the mess I made:

He then was kind enough to break out his acrylic paints, mixed together a couple different colors and started painted them. He was almost completed when he grabbed the tip of the left g2 to move. Unfortunately, the epoxy repaired point was not strong enough to hold the weight of the antler by itself, and it snapped off. BIGBULL was kind enough to re-repair using fiberglass. I think it looks much better than I could ever have done. Here is the finished product:

Another look:

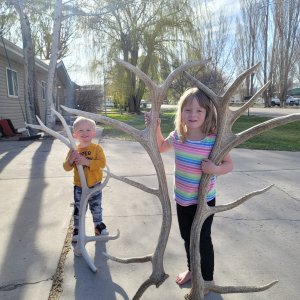
One for scale, my daughter holding them:

Next stop, the taxidermist for a full shoulder mount. Now I gotta find a cape...
http://www.monstermuleys.info/dcforum/DCForumID18/3620.html
Thank you all for your tips, I used a lot of them.
Thought I'd show a time sequence from when I found them last spring to how they look now. Here's a cell phone pic of how they first looked when I picked them up (not ATL):

Porcupine did quite a bit of damage to the left g2 and g4, and time and weather also extracted their toll: lots of deep cracks and holes. But it was obvious that they came from a special deer, so I was excited about attempting to restore them. Got a lot of good tips from the NM and Shed Hunting forums, as well as from BIGBULL48.
I initially repaired the points and cracks using epoxy putty. The filling and sanding and refilling and re-sanding proved a tedious chore for my A.D.D., and I started to lose interest until got a Mountain Mike's Skull Kit and attached 'em just to see what they would look like:

That got me excited to start again. I liked how my repair job on the left g4 looked, but never did like the left g2, so I cut it off and started over. It eventually looked like this:

Time to stain. I initially tried to use W.A.M., but I failed to read the directions where it said it wouldn't stain putty and natural bone evenly. The result was where the natural bone was left exposed looked great, but the repaired parts obviously did not blend in. My fault, I should have read the directions better.


Even my wife and daughters, who nothing about these things other than to mock me, could tell it wasn't working, and now had something new to mock me about. Back to the drawing board. I asked BIGBULL48, who in his spare time is wildlife artist and taxidermist, would he recommend I should do. He told me get some enamel based off-white spray point and cover up the mess I made:

He then was kind enough to break out his acrylic paints, mixed together a couple different colors and started painted them. He was almost completed when he grabbed the tip of the left g2 to move. Unfortunately, the epoxy repaired point was not strong enough to hold the weight of the antler by itself, and it snapped off. BIGBULL was kind enough to re-repair using fiberglass. I think it looks much better than I could ever have done. Here is the finished product:

Another look:

One for scale, my daughter holding them:

Next stop, the taxidermist for a full shoulder mount. Now I gotta find a cape...


